You've seen the videos. The slow, deliberate pour. The bloom of fresh grounds. The clean, bright cup at the end. Pour-over coffee looks complicated — but it really isn't. You just need the right tools to start.
This guide tells you exactly what a pour-over beginner needs, what you can skip, and why a complete starter kit beats buying gear piece by piece.
What Is Pour-Over Coffee?
Pour-over is a manual brewing method where you slowly pour hot water over freshly ground coffee in a cone-shaped dripper. The water passes through the coffee and a paper filter, dripping into your cup or server below.
The result: a clean, bright, and flavorful cup that highlights the natural character of the coffee — fruity, floral, chocolatey, or nutty, depending on the bean. It's the best method for tasting what specialty coffee actually has to offer.
What Does a Pour-Over Beginner Actually Need?
Here's the honest list — no fluff, no upselling:
1. Manual Coffee Grinder (★ Most Important)
Freshly ground coffee makes more difference than any other variable. Pre-ground coffee goes stale within days; whole beans stay fresh for weeks. A manual grinder lets you grind just before brewing, unlocking the full flavor of the bean.
What to look for: Conical steel burrs, adjustable grind settings, capacity for 15–20g per brew. For pour-over, you'll use a medium to medium-fine grind — roughly the texture of sea salt.
2. Gooseneck Kettle
A regular kettle works, but a gooseneck spout gives you precise control over where and how fast you pour. For pour-over, this matters — an even, circular pour extracts the coffee evenly and prevents bitter or weak spots.
What to look for: A narrow spout, comfortable handle, and a capacity of at least 600ml. Stovetop or electric both work fine.
3. Cone Dripper
The dripper holds your paper filter and ground coffee during the brew. Cone-shaped drippers (like the V60 style) give you a clean, tea-like cup with excellent clarity. They're simple, easy to clean, and last for years.
4. Paper Filters
Filters trap coffee oils and fine particles, giving you a clean cup with no sediment. Make sure your filters match your dripper size. Stock up — you'll use one per brew.
5. Coffee Server or Mug
You need something to catch your coffee as it drips through. A glass server lets you see the brew volume clearly; a mug works perfectly for single servings.
6. Digital Scale (Optional but Recommended)
Measuring coffee by weight (not scoops) produces consistent results every time. The standard ratio for pour-over is 1:15 to 1:17 — meaning 15–17g of water per 1g of coffee. Even a basic kitchen scale works; a compact coffee scale with a timer is ideal.
Why Buy a Starter Kit Instead of Buying Separately?
Most beginners try to piece together their setup one item at a time — and run into three problems:
- Compatibility. Not all drippers, filters, and servers are designed to work together. Mismatched gear leads to frustrating brews.
- Cost. Buying six items separately adds shipping fees, packaging waste, and usually a higher total price than a curated kit.
- Decision fatigue. There are dozens of grinders, kettles, and drippers out there. Choosing each one separately takes hours of research.
A well-designed starter kit solves all three — everything fits together, ships together, and works together from day one.
Our beginner pick
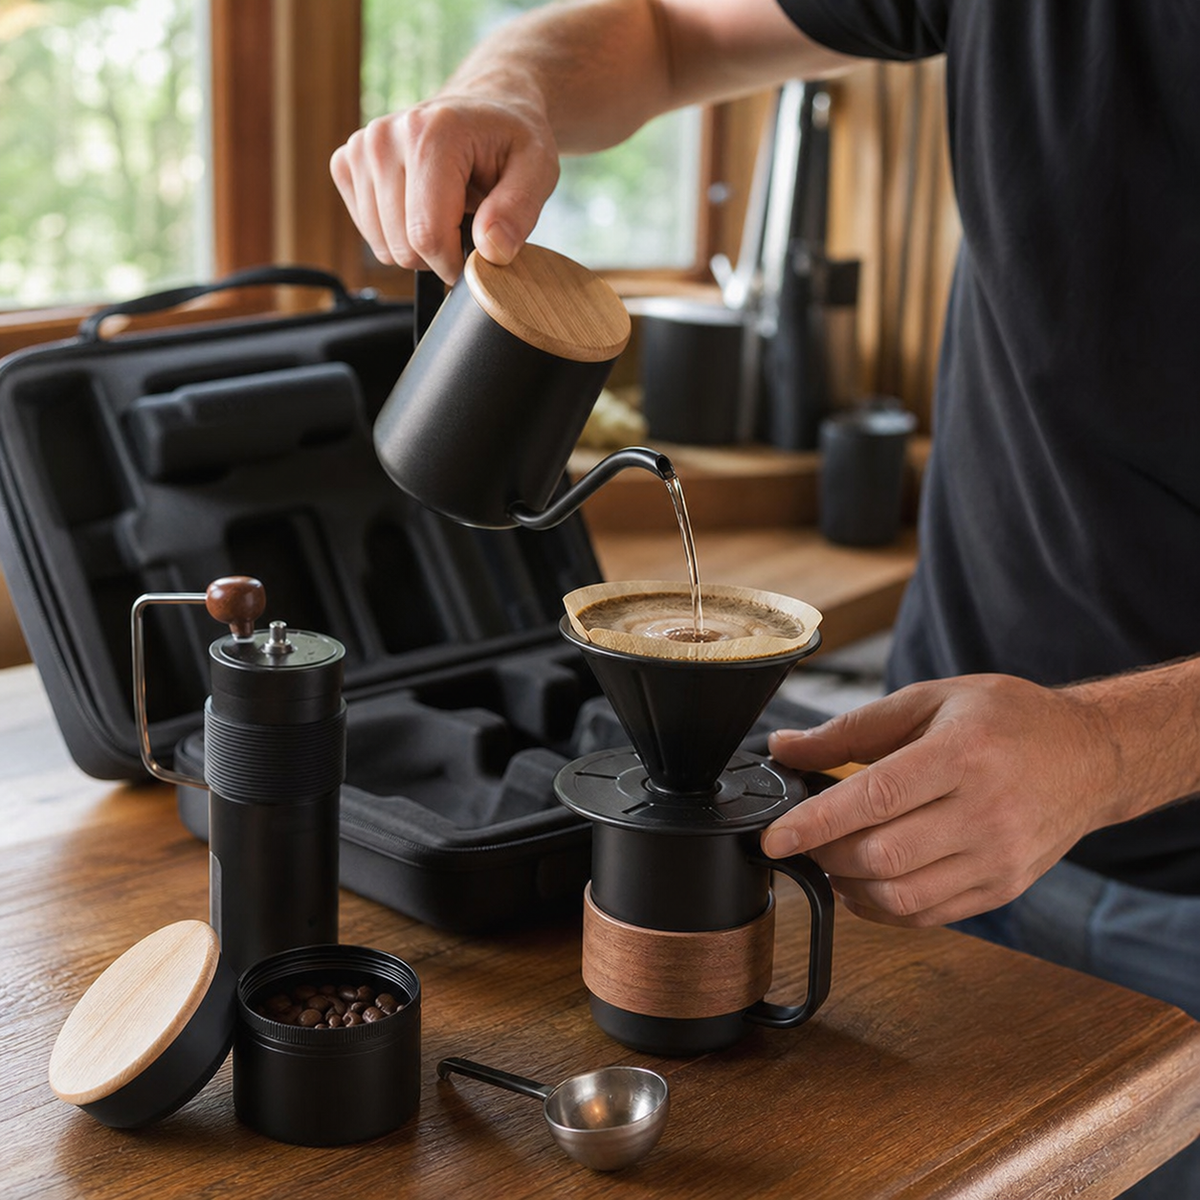
Slow Mill Pour-Over Starter Kit — 6 Pieces
Everything you need to brew your first pour-over cup — in one box. Includes a manual grinder, gooseneck kettle, glass cone dripper, glass server, paper filters, and a compact scale. No guesswork. No compatibility issues. Just great coffee from the first brew.
- ✅ All 6 pieces designed to work together
- ✅ Beginner-friendly — no experience needed
- ✅ Gift-ready packaging
- ✅ Free U.S. shipping on orders over $49
Use WELCOME10 for 10% off your first order.
How to Brew Your First Pour-Over: 5 Simple Steps
- Boil water and let it cool for 30 seconds (aim for 90–96°C / 194–205°F).
- Grind your coffee to a medium-fine texture — like sea salt. Use 15g of coffee for a 250ml cup.
- Place your filter in the dripper and rinse it with hot water. This removes the paper taste and preheats your cup. Discard the rinse water.
- Add your grounds to the filter. Start the timer. Pour just enough water to wet all the grounds (about 30–40ml) and wait 30 seconds. This is the bloom — it releases CO2 and prepares the grounds for even extraction.
- Pour slowly in circles, keeping the water level steady. Total brew time should be 3–4 minutes. That's it.
Your first cup won't be perfect — and that's fine. Adjust your grind coarser if it's bitter, finer if it's weak. You'll dial it in within a few brews.
Beginner Questions, Answered
How much does a pour-over setup cost?
A basic setup — dripper, kettle, grinder, filters — typically costs $60–$120 if you buy separately. A complete 6-piece starter kit gives you better value and eliminates compatibility guesswork.
Is pour-over hard to learn?
No. The technique takes 2–3 brews to feel comfortable. The main variables are grind size, water temperature, and pour speed — all easy to adjust once you know what to look for.
How long does a pour-over take?
About 5–6 minutes total — 2 minutes to grind and prep, 3–4 minutes to brew. Faster than waiting in a coffee shop line.
What coffee should I use for pour-over?
Light to medium roasts work best for pour-over — they highlight the bean's natural flavor clearly. Single-origin coffees from Ethiopia, Colombia, or Yunnan are excellent starting points.
Is a starter kit a good gift?
Yes — it's one of the most complete and practical gifts for anyone interested in coffee. Everything arrives together, gift-packaged, ready to brew from day one.
Start brewing today
Your first great cup is one kit away.
The Slow Mill Pour-Over Starter Kit — 6 Pieces includes everything a beginner needs. No research required. Use WELCOME10 for 10% off your first order.
Shop Starter Kit →